Did You Know?
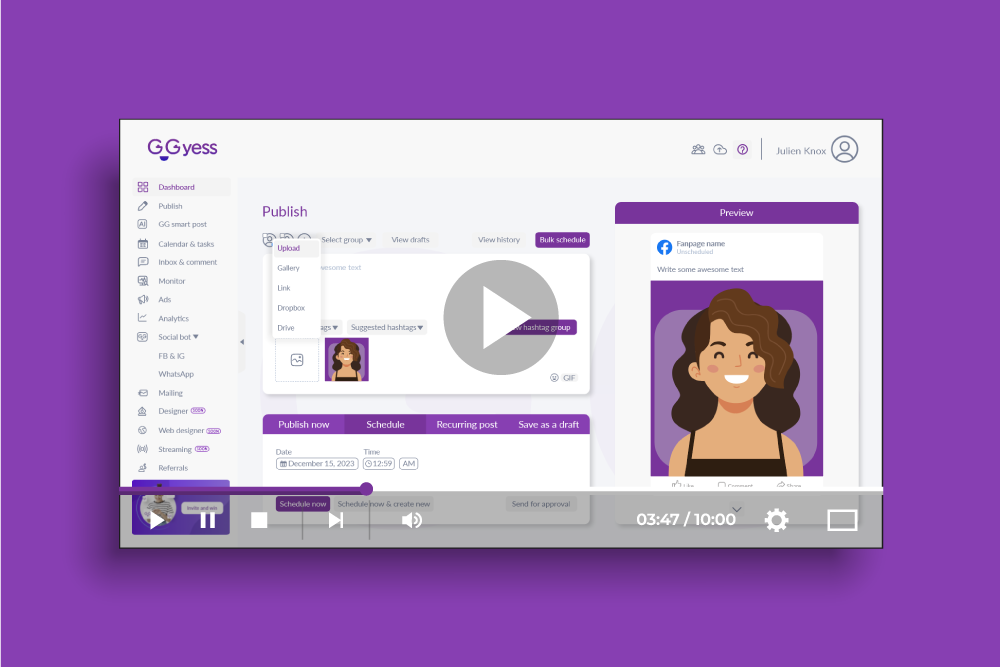
With GGyess you can create content in seconds using Smart Post
With GGyess you can create content in seconds using Smart Post
We’re here for you. Find articles, help and advice for getting the most our of GGyess
More results...


See what other people have asked and how we have solved it
To view the performance of your ads you can see the tutorial View the performance of my ads and follow the steps indicated there.
You can create your pixel conversion by watching the tutorial Create a pixel conversion and you are done.
Deleting a campaign is very easy, you only have to see the tutorial Delete campaigns and follow the steps indicated there.
You can view the status of your ads by following the steps in the tutorial View the status of my ads.
You can view the summary of your ads and campaigns created in GGyess by following the steps in the tutorial View the summary of my ads and campaigns
Just follow the steps indicated in the tutorial Create an ad, selecting an existing campaign and editing a set of ads and you’re done.
For this we must follow the steps indicated in the tutorial Create an ad, editing the previous configuration of an existing campaign and selecting a set of ads already created and ready.
You just have to watch the tutorial Create an ad, selecting an existing campaign and an ad set already created and follow the steps indicated there.
You only have to see the tutorial Edit campaign preset and edit an ad set and follow the steps indicated there
You can edit the previous settings of a campaign and select an ad set, following the steps of the tutorial Edit campaign settings and select an ad set
To edit an ad set by creating a new campaign, follow the steps in the tutorial Create ad set, creating a new campaign and you are done.
You can create an ad set by editing an already created campaign by following the steps in the tutorial Create ad set by editing an already created campaign.
Just watch the Edit ad set tutorial, creating a new campaign and follow the steps indicated there.
You can edit an ad set by editing an already created campaign, following the steps in the tutorial Edit ad set, editing an already created campaign
To edit an ad set with an already created campaign you must follow the steps of the tutorial Edit ad set, with an already created campaign and you are done.
You can create a campaign and edit an already created ad set by following the steps in the Create campaign and edit already created ad set tutorial
You just have to watch the tutorial Creating a campaign with selection of an already created ad set and follow the steps indicated there
You can create a campaign and edit an already created ad set, by following the steps in the tutorial Creating a campaign and creating an ad set and ads
To visualize the day in which you have more impressions in any social network, you can do it in the GGyess Analytics module, to learn how to do it, you can first go to Define analytics and then to Visualize the graphs of your social networks and follow the steps indicated in both.
To visualize in which countries have more impressions you must do it in the GGyess Analytics module, to learn how to do it, you can first go to Define analytics and then to Visualize the graphs of your social networks and follow the steps indicated in both.
To visualize the hour in which you have the most impressions in any social network, you can do it in the GGyess Analytics module. To learn how to do it, you can first go to Define analyticsand then to Visualize the graphs of your social networks and follow the steps indicated in both.
To visualize how many likes your posts got you can do it in the GGyess Analytics module, to learn how to do it, you can first go to Define Analytics and then to Visualize your social network graphs and follow the steps indicated in both.
To visualize which are your best posts of all your social networks, you can do it in the GGyess Analytics module, to learn how to do it, you can first go to Define analytics and then to Visualize the graphs of your social networks and follow the steps indicated in both.
To visualize the total of your organic posts, you can do it in the GGyess Analytics module, to learn how to do it, you can first go to Define analytics and then to Visualize the graphs of your social networks and follow the steps indicated in both.
To visualize the total of your fans, you can do it in the GGyess Analytics module, to learn how to do it, you can first go to Define analytics and then to Visualize the graphs of your social networks and follow the steps indicated in both.
The reach of your publications is of vital importance, and GGyess knows it, so you can see in detail and with accurate graphs the reach of your publications in our Analytics module, to learn more about this module and view the reach of your publications you can go to Define analytics and View graphs and analytics of your social networks and follow the steps indicated in both.
The options are too many, from likes for each post, to geographic location of your biggest impressions, to see in detail each analytics that GGyess offers you go to Definition of analytics.
You should go to the tutorial Schedule sending of analytics by mail and follow the steps indicated, you will see that it is very easy.
To send your analytics by mail, simply follow the steps indicated in the tutorial Send analytics by mail and you are ready to go.
Viewing your graphs is very simple, to do so you must go to Define analytics and View graphs and analytics of your social networks and follow the steps indicated.
If you have a friend who recommended you to use GGYess you can use the discount code your friend gave you to get discount on your first purchase.
GGYess does not store any information related to your credit card. All the information you enter is stored in an API which serves as an intermediary between your credit card and GGYess. So you can be sure that no information will be stored.
You can request a refund on your first purchase during the first 3 days after your payment date. If you cancel after the first 3 days you will not be able to request a refund, since the time limit for refund requests is 3 days after the purchase. This can be seen in the Terms and Conditions you accepted when you made your payment. You can cancel your plan by following the steps to do so in Cancel my plan so that, on the next payment date, you will not be charged and your plan will be cancelled.
For the GGYess team your opinion is very important and we know that your ideas will help us to improve every day for you, so you can make your requests by following the steps detailed in Request a feature.
To make a suggestion or comment about your use of GGYess, recommendations, or suggestions for improvements you can read the step-by-step on how to do it by reading Make a suggestion or comment to GGYess.
In order to download your payment receipts related to purchases made on GGYess, you can read Download receipts.
To see the details of your purchases and get receipts for them, you can follow the link to View purchase details.
To increase the amount of available storage you can read Buy packages and find out how to increase your limit.
To know the differences between one plan and another it is important to know the characteristics of each plan, for this you can read the article Characteristics of each plan.
Whether you want to upgrade your plan type or try a plan with fewer features you can do so by following the steps detailed in Change Plan.
To view a publication you have already created follow these links:
Or if you want to change the type of view you can follow these steps:
We are sorry. It is currently not possible to recover a post that you have deleted by mistake.
The advantage is that creating a new post with GGYess is very easy! And creating it again won’t take much time.
To delete a post you created or scheduled in Social Calendar, follow this link to follow the step-by-step instructions:
To search for a publication you can’t find in Social Calendar, follow this link to do so.
To edit a publication from Social Calendar, follow this link for more information:
To create a publication follow this link for more information:
The Kanban board is a great tool we have created for you so you can better organize your tasks. Follow these links for more information:
There are many ways to see how to view a task. You can follow these links for more information:
Sorry, we are sorry. It is currently not possible to recover a task that you have deleted by mistake.
The advantage is that creating a new task with GGYess is very easy! And creating it again won’t take much time.
Do you want to know how to recreate your task? Follow this link for more information:
If you want to delete a task, you can go to the following links to find out how to do it:
To make any changes or updates to your task, just follow this link and find out how to do it:
Creating a task with GGYess is very easy. Follow this link to find out how to do it:
It’s very easy, just watch the tutorial Select several conversations or comments to mark them as read and you’re done.
To carry out this process you have to watch the tutorial Select several conversations or comments to delete them and you are done.
Deleting your comment is an easy process, just see the Delete comment or message tutorial and you are ready to go.
Deleting your messages is very easy, you only have to see the tutorial Delete comment or message and that’s it.
This process is simple, just watch the tutorials Account selection to view mentions and you are ready to go.
This process is simple, just watch the tutorials Selecting accounts to reply to comments and Replying to a comment.
This process is simple, just watch the tutorials Selecting accounts to reply to messages and Replying to a message.
Adding your own accounts for comparison is very simple. Just add your account link as a competitor. To do this you can follow the Add a new competitor link to find out how to do it and the link to Make a comparison between a competitor and another
To make the comparison follow the link Make a comparison between a competitor and another competitor to see the step by step on how to do it.
Follow these simple steps detailed in View a information and performance of a competidor to do it.
Follow the steps in Filter the Competitors window to do it.
Follow the link to Add a new competitor and you will find out how to do it with these few steps.
If you need to find the list of groups you have created in My monitor, just follow the steps detailed in View the boards in a group list in My monitor.
In order to add a board, just follow the link on how to Add a board to a group list in My monitor.
In order to group your boards in a group list based on a certain topic you can do it by creating a group list, if you follow this link you can find out how to Create a group list in My monitor.
If you want to delete a board follow these simple steps in Delete a board in My monitor to find out how to do it.
If you want to update a new location for your monitoring board search follow the steps in Change the search location in My monitor to do it.
If you want to follow a new trend just follow the link to Add a new monitoring board in My monitor and you will find out how to do it with these few steps.
If you need to find the list of groups you have created in Trending just follow the steps detailed in View the boards in a group list in Trending.
To add a board to a group list you have already created, just follow the link on how to Add a board to a group list in Trending.
In order to group your boards in a group list based on a certain topic you can do it by creating a group list, if you follow this link you will find out how to Create a group list in Trending.
If you want to delete a board follow these simple steps in Delete a board in Trending to find out how to do it.
If you want to update a new location for your trending search follow the steps in Change the trendings search location to do it.
If you want to follow a new trend just follow the link to Add a new trend in Trending and you will find out how to do it with these few steps.
To delete a rule in the bulk post area, we recommend you to see the tutorial Delete a rule created in the recurring bulk post schedule and follow the steps indicated there.
To edit a rule in the bulk post area, we recommend you to see the tutorial Edit a rule created in the recurring bulk post schedule and follow the steps indicated there
We recommend you to see the tutorial Search for a scheduled or recurring post and follow the steps to find your scheduled and recurring posts.
To create a new rule, we recommend you to see the Create new rule tutorial in the bulk post area and follow the steps mentioned there.
It is very easy, you only have to see the tutorial Edit a rule created in the recurring schedule of a post and follow the steps indicated there.
It is time to delete the rules that you no longer need, to do this you should see the tutorial Delete or remove a rule created in the recurring schedule of a post and follow the steps indicated there and you are done
To find the posts pending approval, you only have to see the tutorial Know the status of a post submitted for approval and follow the steps indicated there.
To find the posts pending approval, you only have to see the tutorial Find a post in Approval status and follow the steps indicated there.
To edit a post with recurring schedule you only have to follow the steps indicated in the tutorial Edit post with recurring schedule and you are done
For the recurring scheduling of several posts you should only see the tutorial and Creating several posts in a row for your social networks mainly focus on the last part as it gives you instructions on how to perform the process specifically for the recurring scheduling of several posts in a row
Deleting your group of hashtags is easy, you should see the tutorial Delete group of hashtags and you are done.
Choosing your hashtags is easy, just follow the steps in the tutorial Choose a group of hashtags and you’re done
To create a group of hashtags, just follow the steps indicated in the tutorial Create group of hashtags and you are ready to go.
To visualize the previews, we recommend you to see the tutorial Visualize the different previews of your post and in this way you will be able to preview your post in the social networks of your choice.
Deleting an already created draft is very easy, you can see the tutorial Delete draft that I created for my social networks and follow the steps indicated there and that’s it.
To view your list of drafts we recommend you to see the tutorial Edit a draft, as it shows you where you can view the list of your drafts.
Scheduling your post in bulk can be of great help to boost your social networks, so we recommend you to watch the tutorial Schedule post in bulk and follow the steps indicated there so you can learn how to schedule your posts in bulk.
Viewing the history of your publications created in GGyess is very simple, you only have to see the tutorial View my publications history and follow the steps indicated there
It’s time to edit your drafts, just watch the Edit a draft tutorial and follow the steps there and you will be able to edit as many drafts as you want.
This option is only available for the Enterprise plan
All you have to do is watch the tutorial Create a Post for approval process and follow the steps indicated there and everything will be ready for you to start creating your post for your teams so they can successfully go through the approval process
To create a draft of your post, you only have to see the tutorial Create a Draft of my Post for social networks follow the steps indicated there and everything will be ready for you to create your drafts.
Creating your own rules for scheduling your posts is super easy, you can see the tutorial Creating recurring post scheduling rules for your social networks, follow the steps there and everything will be ready for your posts to be uploaded at the time you want and according to your rules
It’s time to recurrently schedule your posts, you can see the tutorial Recurring Post Scheduling for your social networks, follow the steps indicated there and you will be able to recurrently schedule all the posts you want.
Scheduling your post is simple, you can see the tutorial Post Scheduling for your social networks, follow the steps there and everything will be ready for your posts to be uploaded at the time you want.
Creating multiple posts for your social networks is now easy with GGyess, you can watch the tutorial Creating Multiple Posts in a row for your social networks, follow the steps there and you will be able to upload as many posts as you want.
Become an expert post creator, watch the tutorial Create post to publish in your social networks, then follow the steps indicated there and start enjoying the experience of creating post with GGyess
It’s time to create your account groups, you can see the tutorial Creating account groups to upload your posts, follow the steps there and you will be able to create your account groups as you wish
To select your account groups, you can see the tutorial Select account groups to upload your posts, and start selecting the accounts you want to publish your content
Selecting your accounts is simple, you can see the tutorial Selecting accounts to upload your post to social networks, follow the steps indicated there and everything will be ready.
To search for a publication in Approbal status, click on the following link to follow the step-by-step instructions on how to do it:
If you have had a publication rejected and you don’t know why, click on the following link:
Have you sent a publication for review and you don’t know how to know its status? Don’t worry, click on the following link to find out step by step the status of your publication:
If you have been sent a publication for review and you don’t know how to approve or reject it, follow the link below which will take you step by step on how to do it:
To activate or inactivate a team member, click on the following link and follow the step-by-step instructions on how to do it:
Or, if you only want to edit a member’s information, click on this link:
And if you only want to change the permissions of the member’s role, you can click here:
To edit the basic information of a team member, you can do it in several ways. Go to the following link and find out how to do it:
To remove a member from your team, click on the following link and follow the step by step instructions on how to do it:
Find out which permissions a member has in your team by clicking on the following link:
To customize the role of a member from Teams, click on the following link to follow the step-by-step instructions on how to do it:
If you want to change the role of a member of your team, just click on the following link and you will find the step-by-step instructions on how to do it:
If you want to add a new member to your team, click on the following link to follow the step-by-step instructions:
To edit the basic information of your team’s profile, click on the following link to follow the step by step instructions:
If you want to delete a team from your GGYess account you can do it in a very easy way, click on the following link and you will see step by step how to delete it:
Creating a team for your GGYess account is very simple, click on the following link and you will see step by step how to create it:
To view your tickets and know their status read the link: View the status of a ticket
If you are subscribed to the Premium or Enterprise plan you will have access to Ticket creation, to do so follow the steps in the Create a ticket link.
To know the status of your plan, how much capacity your plan has and the indicators of your consumption read: Plan Usage.
This is very simple, you just need to follow the steps in Rename an accounts group
Follow this link to find out how to View accounts grouped in a group.
If you want to organize your accounts by groups, either social networks, type of company, among others, follow the link to Create an accounts group.
If you are determined to remove an account from GGYess, read Delete an account to do so.
This is very simple, just follow the steps on how to Search for an account.
You can do this easily by following the steps detailed in the Add an account link.
It all depends on the problem you have.
If you want to use a module or a tool and you don’t know how to do it, you can find the step by step of what you need in GGYess Help.
To find out how to do something you can read how to Quickly search for help in GGYess.
If you want to report a malfunction or suggest an improvement you can read how to access Make a Suggestion and comment.
However, if you want to report a bug and request a repair you can Create a ticket.
Whether you want to activate or deactivate the alerts about news in GGYess, you can do so by following the steps detailed in: Filter notification.
Whether you want to activate or deactivate the alerts about news in GGYess, you can do so by following the steps detailed in: View notifications.
Whether you want to activate or deactivate the alerts about news in GGYess, you can do so by following the steps detailed in: Delete notification.
Whether you want to enable or disable alerts on assigned conversations in GGYess, you can do so by following the steps detailed in: Enable or disable alerts.
Whether you want to enable or disable alerts about pending tasks in GGYess, you can do so by following the steps detailed in: Enable or disable alerts.
Whether you want to enable or disable alerts on assigned tasks in GGYess, you can do so by following the steps detailed in: Enable or disable alerts.
Whether you want to enable or disable alerts about posts sent for approval in GGYess, you can do so by following the steps detailed in: Enable or disable alerts.
Whether you want to enable or disable alerts for approved or rejected publications in GGYess, you can do so by following the steps detailed in: Enable or disable alerts.
Whether you want to enable or disable alerts on receipts sent by email, you can do so by following the steps detailed in: Enable or disable alerts.
Whether you want to enable or disable alerts on the status of your tickets, you can do so by following the steps detailed in: Enable or disable alerts.
Whether you want to activate or deactivate alerts about offers in GGYess, you can do so by following the steps detailed in: Enable or disable alerts.
Whether you want to activate or deactivate the alerts about news in GGYess, you can do so by following the steps detailed in: Enable or disable alerts.
Whether you want to enable or disable Publish module alerts related to scheduled, approved, rejected or published publications, you can do so by following the steps detailed in: Enable or disable alerts.
Whether you want to activate or deactivate the alerts on new referrals, you can do so by following the steps detailed in: Enable or disable alerts.
Whether you want to enable or disable alerts on announcement news, you can do so by following the steps detailed in: Enable or disable alerts.
Whether you want to enable or disable storage space alerts, you can do so by following the steps detailed in: Enable or disable alerts.
This is easy
Head over to our Facebook group

alkjlskjlkasjdlksajdlkf
asñldkfjñalskdjfa